
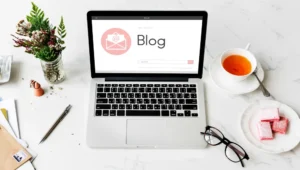
Starting a WordPress blog is one of the best ways to share your ideas, expertise, or even build a business online. In this guide, we’ll walk you through every step needed to set up your WordPress blog, from choosing a domain name to publishing your first post.
Introduction
WordPress powers over 40% of websites on the internet today. It’s easy to use, flexible, and offers tons of customization options. Whether you’re starting a personal blog or a business blog, WordPress is a great choice.
Let’s get started with a simple step-by-step process to create your very own WordPress blog.
Step 1: Choose a Domain Name
The first thing you’ll need is a domain name. This is the web address where people will find your blog (like yourblog.com).
How to Select a Domain Name
- Keep it short and memorable: Your domain name should be easy to type and remember.
- Use relevant keywords: Include words related to your niche to help with SEO.
- Avoid hyphens or numbers: These can be confusing and harder to remember.
Domain Name Tips for Beginners
- Choose a name that reflects the purpose of your blog.
- Try to get a .com domain as it’s the most popular and professional-looking.
- Use domain name generators if you’re stuck on ideas.
Step 2: Select a Web Hosting Service
Next, you need a hosting provider. Web hosting is where all your blog’s files are stored. You’ll need to choose a hosting provider that’s reliable, fast, and offers good customer support.
Best WordPress Hosting Providers
- Bluehost: Great for beginners and officially recommended by WordPress.
- SiteGround: Known for excellent customer service and fast performance.
- HostGator: Offers affordable plans with easy WordPress installation.
How to Set Up Your Hosting Account
- Choose a hosting provider and select a plan that fits your needs.
- Register your domain (if not done already) through the hosting provider.
- Install WordPress with just one click using their automatic installer.
Step 3: Install WordPress
Installing WordPress is easy. Most hosting providers offer one-click WordPress installation.
- Log into your hosting account.
- Find the WordPress installer in your hosting dashboard.
- Click on the installer and follow the steps to set up WordPress.
- Once installed, you can log into your WordPress dashboard by going to yourdomain.com/wp-admin.
Step 4: Choose a WordPress Theme
A theme determines how your blog looks. There are thousands of free and paid themes available, each offering different styles and features.
How to Choose a Theme
- Consider your niche: Some themes are designed for specific types of blogs (e.g., lifestyle, business, or tech).
- Mobile responsiveness: Choose a theme that looks great on both desktops and mobile devices.
- Speed: Fast-loading themes improve the user experience and help with SEO.
Installing a Theme
- From your WordPress dashboard, go to Appearance > Themes.
- Click Add New and browse through the available themes.
- Install your chosen theme and activate it.
Step 5: Customize Your Blog
Now it’s time to make your blog uniquely yours.
Customize WordPress Themes
- Go to Appearance > Customize to change your site’s logo, colors, and fonts.
- Add widgets like recent posts, social media links, and a search bar.
Installing Plugins
Plugins are like apps for your blog. They add extra features like SEO tools, security, and contact forms.
To install plugins:
- Go to Plugins > Add New.
- Search for the plugin you want to install.
- Click Install and then Activate.
Essential Plugins to Install
- Yoast SEO: For on-page SEO optimization.
- Akismet Anti-Spam: To protect your blog from spam comments.
- WPForms: To create contact forms.
Step 6: Add Essential Pages
Before you start blogging, there are a few essential pages you should create:
Key Pages to Add
- About: Tell your readers who you are and what your blog is about.
- Contact: Allow readers to get in touch with you.
- Privacy Policy: Required if you’re collecting user data, especially if you’re using ads or affiliate links.
Step 7: Create Your First Blog Post
Now that your blog is ready, it’s time to create your first post!
Writing Your First Blog Post

- From the WordPress dashboard, go to Posts > Add New.
- Write a compelling title and an engaging introduction.
- Break your content into easy-to-read paragraphs.
- Use images, videos, and links to enhance your content.
- Don’t forget to add relevant keywords to improve SEO.
Publishing Your Blog Post
Once your post is ready, hit Publish. Your blog is now live for the world to see!
Step 8: Promote Your WordPress Blog
Now that your blog is set up and you’ve created a post, it’s time to get traffic to your site.
How to Promote Your Blog
- Share on Social Media: Post your articles on Facebook, Twitter, and Instagram.
- SEO: Optimize your posts with keywords and use plugins like Yoast to improve on-page SEO.
- Guest Posting: Write articles for other blogs in your niche and include a link to your blog.
- Email Marketing: Build an email list and send newsletters with blog updates.
Conclusion
Congratulations! You’ve successfully created a WordPress blog. Now, continue creating great content, promoting your blog, and engaging with your audience.
Starting a blog can feel overwhelming at first, but with WordPress, it’s simple and straightforward. Keep learning, experimenting, and growing your blog. Good luck!

